The release of the Wolfsbane Exotic Axe in Destiny 2 marks one of the most exciting additions to the game’s arsenal in recent memory — a weapon that blends savage melee combat with the eerie precision of Vex technology. Today I’m going to show you how to get the weapon, we’ll go through the Heliostat exotic mission in detail, plus how to get the intrinsics and the first catalyst for attrition orbs.
Wolfsbane (Exotic Axe)
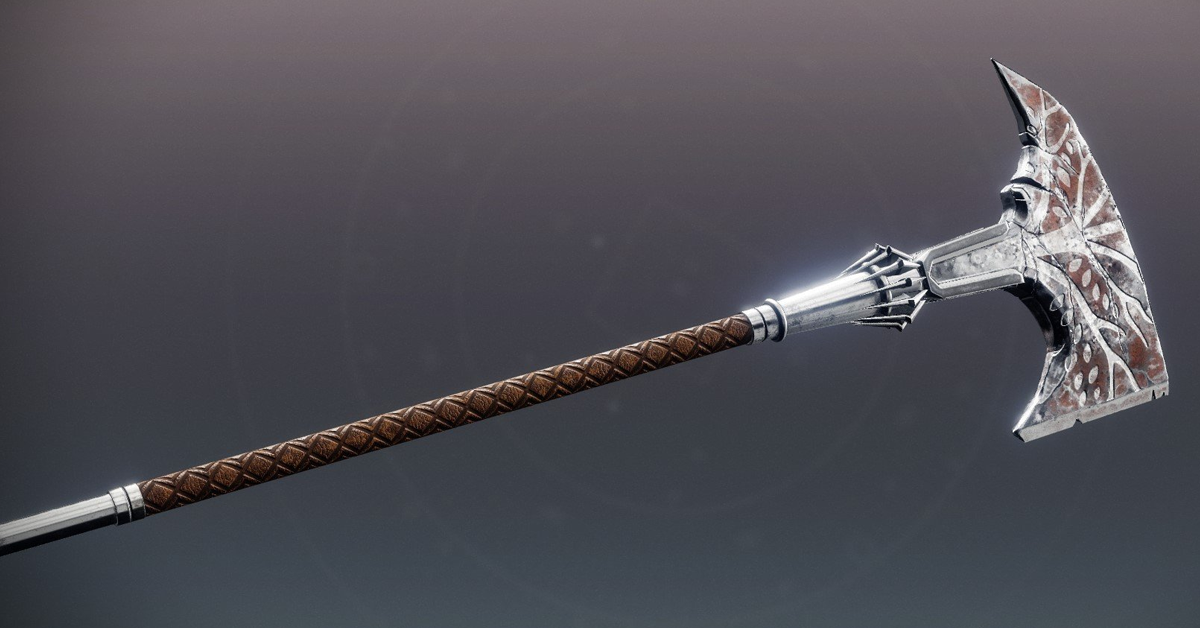
Wolfsbane is the newest Exotic Axe introduced in Destiny 2’s Heliostat mission — a weapon that bridges brutal melee combat with the sci-fi finesse of nanite technology. Classified under the sword category, Wolfsbane stands out as one of the most aggressive and versatile close-range weapons Bungie has ever designed. Unlike traditional swords, this axe thrives on sustained offense, rewarding players who keep up relentless pressure with nanite-driven self-healing and explosive power surges.
Its Exotic intrinsic perk, Resurgence Directive, forms the heart of the weapon’s identity. Every light attack with Wolfsbane generates Sword energy and has a chance to spawn Quicksilver nanites — small, swarming orbs that attach to enemies and allies alike. When these nanites attach to you, they not only boost your damage but also heal you in the thick of battle, giving the weapon a strong hybrid feel between offense and survival. The result is a weapon that feels alive — constantly humming with energy as nanites orbit you in a storm of chrome fury.
The weapon’s unique trait, Nano-Assault, deepens this synergy even further. Each time nanites attach to you, they charge Wolfsbane’s blade. Once your Nano-Assault meter fills, you can trigger an Overclocked state, dramatically increasing your damage output for a short time. During this state, a fully charged heavy attack releases a devastating Quicksilver swarm-nado — a vortex of nanites that tears through anything in its path. It’s a visual and mechanical payoff that makes Wolfsbane one of the most satisfying melee exotics in the game.
To get the Axe you’ll need to complete the Heliostat Exotic Mission once, and you’ll get WOlfsbane at the end. However, you’ll need to run the mission multiple times to get the intrinsics plus the catalysts. One catalyst is available at the time of publishing this guide for Attrition Orbs.
Heliostat Exotic Mission Guide
When you first load into the Heliostat Exotic Mission, you’ll find yourself outside a Warsat facility in the Plaguelands. Follow the path along the cliffside toward the entrance, clearing out the groups of enemies that appear. Afterward, look for a white interact ring on the ground labeled “Call Radiation Shielding Psion.” Interact with it — but don’t step inside the facility yet.
Summoning the Psion will call forth Decima, Shielding Psion, who projects a protective bubble. Step inside that bubble before moving forward — doing so grants you the “Psionic Protection” buff for 15 seconds, protecting you from the lethal radiation ahead.
Move through the corridors of the facility, keeping your Psionic Protection active by interacting with additional rings along the way. Continue through the winding passages and a ventilation shaft until you reach Bunker War-6. You’ll recognize it by the Warsat-style corridor ahead. Proceed until you find another interact ring, this time to “Call Quicksilver Psion.”
Summoning Thysaeuc, Quicksilver Psion, will trigger the appearance of a Radiolaria Nexus Minotaur. Defeat it to spawn a glowing pool on the floor. Standing in this pool grants you “Radiolarial Suffusion,” which fills a progress bar. Stay inside until the buff evolves into “Radiolarial Saturation.”
Once you’ve acquired Radiolarial Saturation, return to Thysaeuc and follow them to a sealed door. Interact with the prompt to “Help Psion Dissolve Barrier” and open the path ahead — leading you into your first major encounter.
Access the Bunker
Upon entering the next chamber, your HUD will update to “Access the Bunker” — your first major encounter objective. You’ll need to destroy four security nodes throughout the area.
The first node is in the ceiling of the central machine in the main room.
After destroying it, waves of enemies will spawn, including another Radiolaria Nexus Minotaur.
Defeat the Minotaur to regain Radiolarial Saturation, then return to your Psion ally to dissolve the barrier leading to an adjacent room.
Each side-room contains another security node. Clear enemies, destroy the node on the ceiling, and move with your Psion as they open new paths. Repeat the process until all four nodes are destroyed. Once complete, the encounter will end — and a massive opening will appear in the middle of the floor.
Descend
Drop into the hole to enter a large chamber filled with platforms leading toward holes in the walls. Do not touch the water below — it’s instant death. Head to the walkway terminal on one side of the room and interact with it to activate the next phase.
Turn around and move to the last doorway on the left wall. This leads into a long corridor filled with more platforms and a deadly trap system. Step into the wrong doorway and you’ll trigger an electric shock — so proceed carefully. Jump across to the final platform on the left-hand wall.
From here, you have two options:
Turn left and complete a short jumping puzzle that loops across the gap, or
Jump directly to the opposite platform if your mobility allows.
Once across, turn right and leap to another platform ahead. Pass through the first set of doors, then immediately turn left to access another short jumping sequence. At the end, go through the right-hand door, turn left again, and drop into the vent below.
Follow the tunnel until you reach a room with another interaction point — “Call Hacking Psion.” Interact to summon your next ally. Look for a red computer screen nearby and interact with it to begin a systems hack. Then, proceed through the glass door beside it to access another set of terminals where you can “Execute Partner Hack.”
Your Psion will unlock the next area, revealing a large control chamber. Radiation pulses from an emitter in the center, so time your movement between waves. Interact with the right-hand terminal and note the symbol displayed. Cross to the left terminal and activate the one with the matching symbol to open a hole in the center of the room.
Inside the hole are electric gates and security nodes. You’ll need to shoot each node as you fall to disable the gates briefly — otherwise, they’ll kill you on contact. Each gate only stays open for a few seconds, so you’ll need quick aim and timing. Once through, continue forward to reach the next puzzle segment.
Access Central Observation
In this puzzle encounter, your task is to input a security code to progress. The area features three connected buildings. Enter the middle structure and summon a Hacking Psion. In the center of this room, a pillar displays several symbols on screens — each corresponding to the side rooms nearby.
Your goal is to match the symbols correctly. Enter a side room, look out its window, and identify which symbols appear on the opposite wall. Record the positions — left, middle, or right — and repeat for all three rooms. Once you’ve matched the sequence (left → middle → right), return to the correct rooms in that order.
Each time, call your Hacking Psion, shoot the vent in the room, move through it, and interact with the terminal bearing the correct symbol. If done correctly, the symbols on the central pillar will align — unlocking the final step: Overriding the Gravlift.
Override the Gravlift
Look to the sides of the observation chamber to find two large jumping puzzles, reminiscent of Spire of the Watcher. Approach the lift on either side to begin your climb. You’ll encounter patches of radiation, but there are Radiation Shielding Psions along the route to refresh your protection buff.
When you reach the upper platform, locate a terminal labeled “Override Gravlift Access.” Activate it before entering the red portal next to it — skipping this step will teleport you away and force a redo of the puzzle. Once activated, step through the portal to return to the center of the room.
Repeat this process on the opposite side puzzle. After both terminals are overridden, a massive Gravlift elevator activates at the far end of the chamber. Jump inside — this will launch you upward into the final encounter area.
Stop the Warsat Launch
The final phase begins in a massive control room filled with enemies. Start by clearing the waves and focus fire on the Radiolaria Nexus Minotaurs to regain your Radiolarial Saturation buff. Use it to assist the Quicksilver Psion in opening side rooms, where you’ll summon a Hacking Psion to access key terminals.
Repeat the process on the opposite side to execute the Partner Hack, which will trigger the appearance of the final boss — Valus Thunn.
Engage the boss until he becomes immune. During this phase, keep an eye on the Radiation Breach timer on your HUD. Kill the Warden Wyvern that spawns nearby to free the Psions and break the boss’s shield, granting you the Protection buff needed to survive the radiation surge.
Once Valus Thunn is defeated, return to the center of the arena. Interact with the glowing ring to initiate the final sequence, then shoot the satellite suspended above the room. Finally, interact with the prompt labeled “Reach Through Time” to complete the mission — and claim your reward: the Wolfsbane Exotic Axe.
Vex Node / Intrinsic Locations
Once you’ve obtained Wolfsbane, your next goal is to unlock its higher intrinsic levels — Resurgence Directive II, III, and IV. These upgrades aren’t earned through simple XP or crafting; instead, they require you to hunt down and destroy a series of hidden Vex nodes scattered throughout the Heliostat Exotic Mission. Each set of nodes corresponds to one intrinsic tier, and finding them all will bring Wolfsbane to its full potential.
Resurgence Directive II — The Traversal Section
After defeating the first major encounter, you’ll enter an open traversal segment filled with moving platforms, laser grids, and rotating solar mirrors. This area introduces the first trio of Vex nodes. I’ll show you on screen where to find them, and you’ll need to destroy them with Wolfsbane to collect them.
Resurgence Directive III — The Platforming Gauntlet
The next set of nodes appears after the second encounter, in a vertical gauntlet of moving lifts and floating platforms. I’ll show you on screen where to find them
Resurgence Directive IV — The Final Arena
The last trio of nodes is located within the final boss arena, a vast mirrored chamber filled with shifting light panels and Vex energy columns. You’ll find one in the main room, then the other two in the side rooms. Collect them all and you’re done.
First Catalyst – Attrition Orbs
To get the first catalyst for Attrition Orbs, you’ll want to find a Datapad on the floor of the mission. Your objective is to find the datapad, then insert the datapad into a terminal. The first datapad is right at the start of the mission, as is the terminal, so just follow along on screen. Once you have done this, finish the mission and the catalyst will drop for you at the end. Then go to Savathun’s Throne World, The Enclave and you’ll be able to reshape Wolfsbane to include the new Exotic Catalyst for Attrition Orbs. 3 more catalysts will be released in the future.
Let me know in the comments what you think.