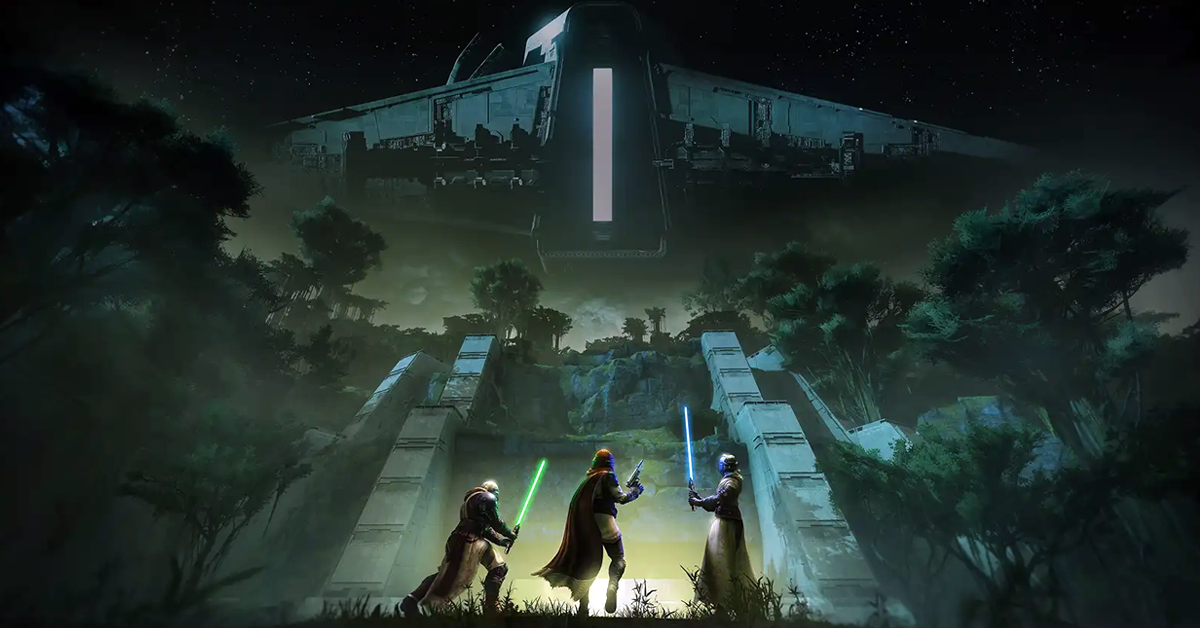
The Equilibrium Dungeon in Destiny 2: Renegades is a three-encounter endgame activity built around the evolving mechanic Gathering Shadow, which allows players to ascend through tiers of power from Shadow Novice, to Apprentice, to Master. Each encounter layers new uses for this buff, teaching players to dispel shields, close Darkness panels, and eventually manipulate the fabric of a Taken throne world. This guide presents a clear, structured walkthrough of every step of the dungeon.
Clearing the Temple Grounds
The dungeon begins with a brief introduction encounter in which players simply clear out Cabal forces occupying the Temple Grounds. This warm-up segment is meant to ease fireteams into the rhythm of the dungeon before entering the arena where a Cabal jump ship is docked. Once players interact with it, the first true mechanic-heavy encounter begins.
Encounter 1: Barant Imperium Forces
The opening encounter revolves around defeating repeated waves of Cabal forces while learning how Gathering Shadow interacts with the three Nameless Apprentices, each of whom arrives with a Darkness-infused immunity shield. To remove these shields, players must lure an Apprentice toward one of three Cabal devices arranged in a triangle around the arena. By standing close to the Apprentice, players encourage it to begin charging Darkness energy. When players activate the device to extend an Arc pylon, the Apprentice’s Darkness attack will charge the pylon. Once this happens, the linked barrier drops, giving access to a Sparrow tunnel beyond.
Inside the tunnels, players must rapidly navigate while collecting Gathering Shadow pools to avoid being killed by the Creeping Shadows debuff. Every Shadow pool resets the timer, and gathering enough pools elevates the buff to Shadow Novice, unlocking the special Shadow grenade. With Shadow Novice active, players can safely travel through tunnels without dying to Creeping Shadows. Returning to the arena with the Shadow grenade, the team can now break an Apprentice’s shield when it begins channeling Darkness, allowing the fireteam to eliminate it. Every defeated Apprentice summons fresh Cabal waves and Behemoth walkers, so maintaining awareness of drop pod landings is essential to survival.
The encounter continues until a total of six Nameless Apprentices are defeated. Each kill refreshes access to Gathering Shadow, ensuring players can maintain their buffs throughout the fight. Once all Apprentices and Behemoths are eliminated, the encounter concludes, and players board the Harvester ship to move deeper into the installation.
Search for Imperial Intelligence (Platforming Section)
The dungeon transitions into a classic Destiny traversal sequence. Players ascend from a red-lit hangar onto a ship’s hull, cross suspended platforms, and drop through a breakable grate into maintenance tunnels. Progression requires navigating a series of turns, vents, and small environmental puzzles, such as shooting fuses that open slanted cargo doors or lower barricades blocking the path. Some sections push the player sideways with environmental wind, requiring careful jumps.
Throughout this area, players frequently regroup at locked doors that only open once the entire fireteam arrives. The path winds through cargo bays and narrow side corridors until it reaches a maintenance shaft on the right-hand wall. This shaft is booby-trapped—shooting it triggers an explosion—so caution is advised. After continuing through several grates and tunnels, the team eventually reaches the entrance to the arena of the dungeon’s first major boss. As a final warning: shooting the nearby observation window vents the room into space, resulting in instant death.
Boss 1: Harrow, Dredgen-Apprentice
Harrow is a dual-Praxic Blade–wielding Gladiator who builds on the first encounter’s mechanics by requiring players to reach Shadow Apprentice. The fight begins when players shoot a fuse that collapses the floor beneath the rally flag area. Upon dropping into Harrow’s arena, players must clear out Cabal forces until doors on both sides of the room open, revealing branching hallways filled with Lackeys. These enemies drop Darkness pools that raise the team’s Gathering Shadow buff from Novice to Apprentice.
Each hallway leads to side rooms containing Darkness-coated panels. With Shadow Apprentice active, players can use their Shadow grenade to close these panels. Every room has three such panels, and the lights above each door turn green to indicate completion. Harrow remains shielded until all panels in the side rooms are neutralized.
Once the panels are complete, players can drop Harrow’s shield in one of two ways. The first involves luring him onto the red bay doors in the arena floor and shooting a fuse to open the trapdoor beneath him. The second requires overloading the room’s Arc pylons by forcing Harrow’s Darkness-infused attacks to strike them. Either method removes a portion of his shield. Because pylons and fuse traps can only be used once, the number of damage phases is limited, and fireteams must capitalize on each opportunity. Once his shield is broken, players gain a short window—roughly thirty seconds—to damage Harrow.
At half health, Harrow retreats by cutting through the back wall of the arena. Players must pursue him down a long corridor where his shields briefly fail, giving the fireteam a final chance to finish him off. After defeating Harrow, players collect their loot and prepare for the dungeon’s second traversal section.
Boarding the Malphas Contemptus (Platforming Section 2)
Following Harrow’s defeat, players must once again acquire at least Shadow Apprentice to deactivate Darkness panels on either side of the platform, revealing a large switch that opens the blast doors. After a brief delay, the massive Cabal warship Malphas Contemptus glides into position below the platform. Players drop onto the ship’s edge and begin navigating a sequence of narrow ledges, red-lit switches, and breakable grates as they descend deeper into its exterior structure.
This path eventually leads to a gigantic hangar full of enemies. Once the area is cleared, players activate a central console that summons moving platforms. Riding these lifts brings the fireteam into the interior of the vessel, through a series of maintenance rooms and corridors. In one chamber, two Cabal Behemoths must be defeated before players can crouch beneath a tank elevator and enter a hidden tunnel system. Several of the vent exits lead nowhere, and only one offers a viable path forward.
Beyond this, players enter an enormous vertical chamber where their goal is to use Shadow Apprentice to open a Darkness panel positioned high above the arena. Reaching this point involves tricky platforming around floating structures or clever use of movement abilities like Strand’s Grapple or Eager Edge Swords. Once inside the pipe beyond the panel, the path becomes linear again, concluding in a guarded hallway that leads directly to the final boss arena.
Final Boss: Dredgen Sere
The concluding encounter centers on a complex interplay between Gathering Shadow, Taken mechanics, and multi-layered arena traversal. When players approach Sere, a 45-second Lure of the Dark timer begins. During this period, players must build their buff to Shadow Master by collecting Shadow pools and defeating Nameless Apprentices around the arena. Apprentices also determine which Taken orbs can be destroyed later in the fight.
When the Lure timer reaches zero, the entire fireteam is transported into a Taken mirror dimension, where five spectral versions of Sere—called Blistered Shadows—await. With the Shadow Master buff, players can “Compel” each shade by standing near it and interacting. Compelling a shade grants a Lure stack and allows the team to break one of the Taken orbs in the real arena. Two shades may be killed outright to reduce the number of required Lure stacks and extend the eventual damage window. Darkness panels in this mirror world can be struck with Shadow grenades to summon temporary platforms, enabling access to the fifth, elevated shade.
Once players exit the Taken dimension, they must destroy all five Taken orbs between both versions of the arena. It is crucial that the final orb be broken near Sere, as the damage phase begins immediately upon its destruction, and repositioning wastes valuable time. During DPS, players can briefly interrupt Sere by shooting his glowing hands when he channels lightning. High burst weapons—such as Parasite, Gjallarhorn-supported rockets, or heavy-hitting shotguns—perform exceptionally well, especially with a Well of Radiance for survivability.
After each damage phase, the arena’s center floods with lethal Arc energy, forcing players to flee to the outer ring. The pylons producing this energy can be disabled by striking nearby Darkness panels with a Shadow grenade, provided players still hold at least the Shadow Novice buff. The cycle of building Shadow, entering the Taken realm, compelling shades, destroying orbs, and unleashing high burst damage continues until Dredgen Sere finally collapses. His defeat completes the Equilibrium Dungeon and grants players their final rewards.